
How to Build a DIY Fire Pit in Your Backyard
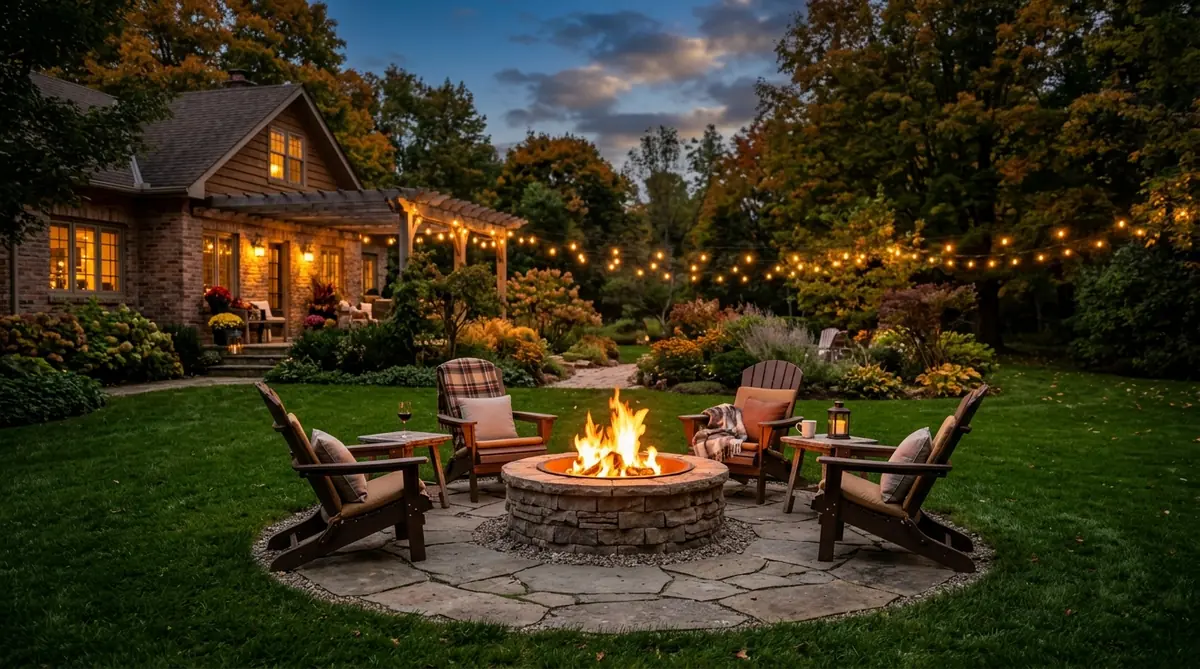
A backyard fire pit costs between $200 and $500 when you build it yourself, compared to $1,500 to $3,000 for a contractor install. You can finish the whole project in a single weekend with basic tools and zero masonry experience. Here is exactly how to do it, from picking the right spot to lighting the first fire.
Pick the Right Location for Your Fire Pit
Location matters more than materials. Get this wrong, and you are either rebuilding or dealing with your local fire marshal.
Place the pit at least 10 feet from your house, fence, shed, or any overhanging branches. Most US municipalities require this minimum clearance, and some push it to 15 or 20 feet. Check your local fire code before you dig anything. Your city or county website usually lists outdoor burning regulations under the fire department section.
Avoid low spots where water pools after rain. A fire pit sitting in a drainage channel will fill with standing water and crack during freeze-thaw cycles. Pick a flat, well-drained area. If your yard slopes, you can level a small section with a tamper and some paver base material.
Also think about wind patterns. If your yard funnels wind from one direction, position seating upwind so smoke blows away from guests. Nobody wants to spend the evening dodging smoke.
Materials and Tools You Need
For a 36-inch diameter stone fire pit (the most common backyard size), here is your shopping list:
- Retaining wall blocks: 36 to 40 trapezoidal blocks (about $3 to $5 each at Home Depot or Lowe's). Pavestone and Belgard are the most widely available brands in 2026.
- Steel fire ring insert: 36-inch diameter, around $30 to $60. This protects the stone from direct heat and extends the pit's lifespan by years.
- Paver base gravel: 4 to 6 bags of crushed limestone or pea gravel for the base layer.
- Construction adhesive: One tube of Loctite PL 500 or similar landscape block adhesive ($5 to $8).
- Lava rock or fire glass: Optional decorative fill for the bottom, $15 to $40 per bag.
Tools:
- Shovel
- Level (a 2-foot torpedo level works fine)
- Tape measure
- Rubber mallet
- Tamper (hand tamper or a rental plate compactor for larger areas)
- Caulk gun for the adhesive
- Garden hose or spray paint to mark the circle
Total material cost runs $200 to $400 depending on the block style you pick and whether you add lava rock or fire glass on top. That is a fraction of what a landscape contractor charges for the same result.
How to Build the Fire Pit Step by Step
Step 1: Mark the Circle
Drive a stake into the center of your chosen spot. Tie a string to it, measure 18 inches (half the 36-inch diameter), and use the string like a compass to mark a circle with spray paint or a garden hose. Then mark a second, outer circle at 24 inches from center to account for the block width.
Step 2: Dig the Foundation
Dig out the area between the two circles about 6 inches deep. This trench is where your first course of blocks sits. Also dig out the interior about 2 inches deep so you can add a gravel drainage layer inside the pit.
Compact the bottom of the trench with your tamper. Loose soil underneath will cause the blocks to shift and settle unevenly over time. Spend five minutes tamping now to save yourself a wobbly pit later.
Step 3: Add the Gravel Base
Pour 2 to 3 inches of crushed limestone into the trench and tamp it flat. Check with your level across multiple points. This gravel base provides drainage and keeps the first course of blocks stable. Skip this step, and your fire pit will lean within a year as the ground underneath shifts.
Step 4: Lay the First Course of Blocks
Set the first ring of retaining wall blocks on the gravel base with the lip (flange) facing down and inward. Place them tight together in a circle. Use the rubber mallet to tap each block level. Check with the torpedo level frequently, both side-to-side and front-to-back on each block.
This first course is the most important. If it is level and circular, every course above it will go on straight. If it is off, the entire pit will be crooked.
Step 5: Stack Additional Courses
Most backyard fire pits use 2 to 3 courses of blocks. Two courses (about 8 inches tall) works fine for a casual seating setup. Three courses (12 inches) gives you more wind protection and a better visual presence.
Stagger the joints like brickwork: offset each block so the seam between two lower blocks lands in the middle of the upper block. Apply a bead of landscape adhesive between courses to lock them together. You do not need to glue the first course to the gravel base, just the upper courses to each other.
Step 6: Install the Steel Fire Ring
Drop the steel fire ring insert into the center. It should sit snugly inside the block walls. If there is a gap between the ring and the blocks, fill it with pea gravel or lava rock. The fire ring keeps direct flame away from the adhesive and the stone, which prevents cracking and gives you a cleaner burn.
Step 7: Add the Finishing Touches
Fill the bottom of the pit with 2 to 3 inches of pea gravel or lava rock for drainage. This also gives you an even surface to build your fire on and prevents the steel ring from sitting directly on soil.
If you want a polished look, add fire glass or lava rock on top of the gravel. Fire glass (tempered glass pieces that do not melt or discolor) runs about $20 to $40 per 10-pound bag and reflects firelight in a way that plain gravel does not.
What Type of Stone Works Best for a Fire Pit
Concrete retaining wall blocks are the go-to choice for DIY fire pits. They are cheap, uniform, and designed to stack without mortar. Brands like Pavestone RumbleStone and Belgard Weston Wall are specifically made for curved fire pit layouts.
Natural stone (flagstone, limestone, sandstone) looks better but costs more and requires more skill to stack evenly. If you go the natural stone route, stick with dense stones that do not absorb water. Porous stones like river rock or certain types of sandstone can trap moisture inside, and when that moisture heats up fast, the stone can crack or even explode. Seriously. It happens.
Brick is another solid option. Standard fire brick (rated for high heat) runs about $1 to $3 per brick. It handles direct flame better than concrete blocks, but you need more of them and the circular layout is trickier without cutting.
Fire Pit Safety Rules You Should Actually Follow
A lot of "safety" advice online is just filler. Here is what actually matters:
- Keep a garden hose or fire extinguisher within reach. Not in the garage. Not inside the house. Right there, next to the pit.
- Never burn treated lumber, painted wood, or trash. Treated wood releases arsenic and chromium when burned. Painted wood releases lead compounds. Burning trash is both illegal in most areas and genuinely dangerous.
- Use a spark screen. A mesh spark screen lid ($20 to $40) keeps embers from floating onto your deck, roof, or dry grass. Worth every penny.
- Fully extinguish before leaving. Douse with water, stir the ashes, douse again. Coals can reignite for 24 hours after they look dead.
- Check wind conditions. If sustained winds exceed 15 mph, skip the fire. Embers travel surprisingly far in wind.
How Much Does a DIY Fire Pit Cost in 2026
Here is a realistic cost breakdown for a standard 36-inch stone fire pit:
| Item | Cost Range |
|---|---|
| Retaining wall blocks (36-40 pcs) | $110 to $200 |
| Steel fire ring insert | $30 to $60 |
| Paver base gravel | $20 to $35 |
| Landscape adhesive | $5 to $8 |
| Lava rock or fire glass (optional) | $15 to $40 |
| Spark screen | $20 to $40 |
| Total | $200 to $383 |
Compare that to a contractor quote of $1,500 to $3,000 for the same basic stone fire pit with labor included. You are saving 70% to 85% by doing it yourself, and the work is genuinely beginner-friendly.
If you already tackled a project like installing patio pavers in your backyard, the fire pit build uses very similar skills: leveling, stacking, and working with gravel base. You already have most of the tools.
Common Mistakes to Avoid When Building a Fire Pit
Skipping the gravel base. Blocks placed directly on soil will settle unevenly within months. The gravel base adds 20 minutes of work and saves the whole project.
Using river rocks inside the pit. River rocks are smooth and look great, but they absorb water from the ground. Heat that water fast enough and the rock splits apart violently. Use lava rock, fire glass, or crushed gravel inside the pit instead.
Building too close to the house. Ten feet is the bare minimum. If your local code says 15 or 20 feet, follow it. One rogue ember on a wood deck or vinyl siding creates a problem that no fire pit is worth.
Forgetting drainage. A fire pit without bottom drainage becomes a muddy bowl after every rain. The gravel layer inside the pit lets water drain through instead of pooling on top of your fire ring.
Not checking local regulations. Some HOAs ban open fire pits entirely. Some cities require a permit. Some counties restrict pit size or fuel type. A five-minute phone call to your local fire department clears this up before you spend any money.
Best Wood to Burn in a Backyard Fire Pit
Hardwoods like oak, hickory, and maple burn hotter, longer, and produce less smoke than softwoods. A cord of seasoned oak costs $250 to $400 in most US markets in 2026, but you burn through it slower than pine or spruce.
Seasoned wood (dried for at least 6 to 12 months) is the only wood you should burn. Fresh-cut "green" wood has too much moisture, which means more smoke, less heat, and faster creosote buildup on anything nearby.
Kiln-dried firewood is available at most Home Depot and Lowe's locations in bundles ($6 to $8 per bundle). It is more expensive per volume than buying a cord from a local supplier, but it is guaranteed dry and ready to burn immediately.
Avoid softwoods like pine and cedar for primary fuel. They pop and throw sparks, and they burn fast with a lot of smoke. Cedar kindling to start the fire is fine, but do not fill the whole pit with it.
Frequently Asked Questions
Do I Need a Permit to Build a Fire Pit?
It depends on where you live. Many US cities allow fire pits under a certain size (typically 3 feet diameter or smaller) without a permit, as long as you meet setback requirements. Always check with your local fire department or building code office first.
How Deep Should a Fire Pit Be Dug?
Dig about 6 inches deep for the block foundation trench and 2 inches inside the pit area for gravel drainage. You do not need a deep hole. The blocks stacked above ground level provide the pit walls.
Can I Build a Fire Pit on a Concrete Patio?
You can, but place a fire pit pad or heat-resistant barrier underneath. Direct fire heat can crack and discolor concrete over time. A steel fire pit on legs with a heat shield works better on concrete than a ground-level stone ring.
How Long Does a DIY Fire Pit Last?
A properly built stone fire pit with a steel fire ring insert lasts 10 to 15 years with minimal maintenance. The steel ring may need replacement after 5 to 7 years depending on use frequency. The concrete blocks themselves hold up well unless they are exposed to direct flame without the ring.
Post a Comment for "How to Build a DIY Fire Pit in Your Backyard"
Post a Comment