
How to Clean a Dryer Vent Yourself
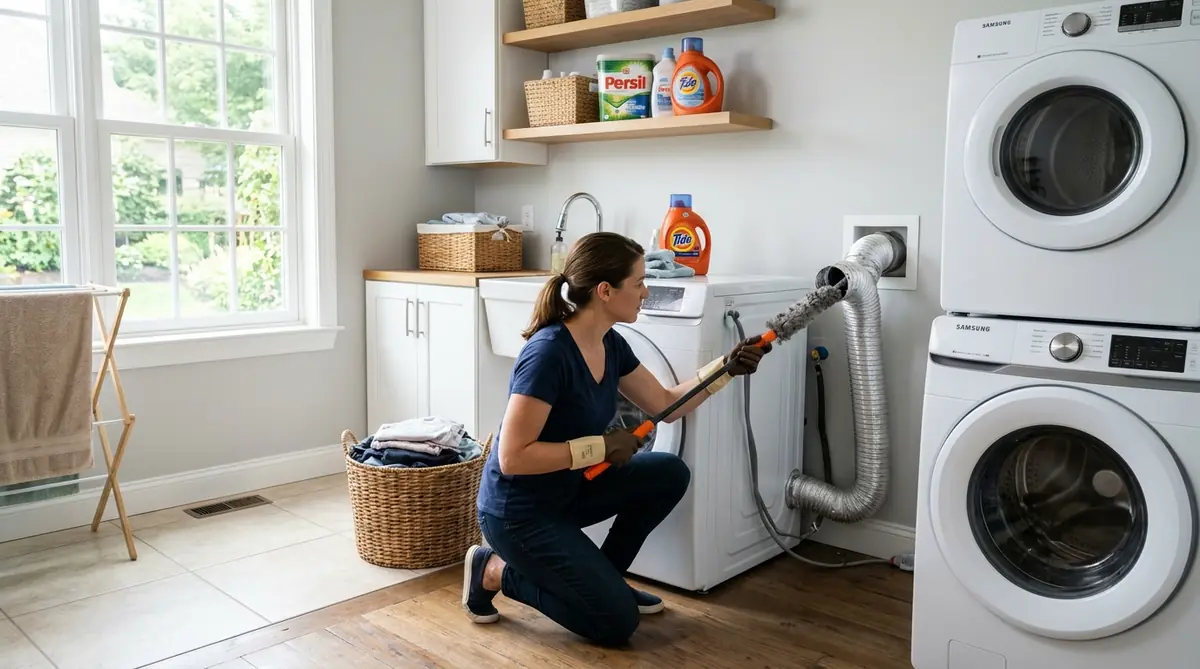
A clogged dryer vent is one of those problems that sneaks up on you. Your clothes take two full cycles to dry. The top of the dryer feels hot enough to fry an egg. Your utility bill creeps up by $20 to $30 a month, and you have no idea why. Worse, the U.S. Fire Administration reports that dryer fires cause an estimated $35 million in property damage every year, and lint buildup in the exhaust vent is the leading cause. The good news? Cleaning a dryer vent yourself takes about 30 to 45 minutes, costs under $25 in tools, and you only need to do it once or twice a year.
Why a Clogged Dryer Vent Is a Bigger Deal Than You Think
Each laundry cycle sheds tiny fabric fibers from your clothes, sheets, and towels. The lint screen grabs the bulk of them, but plenty of fine particles sneak through the mesh and drift into the exhaust duct behind the machine. Month after month, those particles mat together into a dense, highly flammable blanket that strangles airflow.
Once airflow drops, the heating element works overtime to compensate. Your energy bill creeps up, the thermal fuse blows more often, and the whole machine ages faster than it should. A well-maintained dryer typically lasts 10 to 13 years. One running against a packed vent? Expect 6 to 8 years before it quits. The fire angle is not exaggeration either: the National Fire Protection Association points to dirty vents as the number-one cause of residential dryer fires in the United States.
Signs Your Dryer Vent Needs Cleaning Right Now
You probably need to clean your dryer vent if any of these sound familiar:
- Clothes take more than one cycle to dry. This is the most common sign. A normal load of cotton towels should dry in 45 to 60 minutes. If it takes 90 minutes or more, restricted airflow is almost always the culprit.
- The dryer or your laundry room feels unusually hot. Trapped heat means the exhaust air has nowhere to go.
- You smell something burning. Lint is extremely flammable. A burning smell during a cycle is a warning you should not ignore.
- The outside vent flap does not open when the dryer is running. Walk outside and check. If the flap stays shut, the duct is blocked.
- It has been more than 12 months since your last cleaning. Once a year is the baseline. Households that run 5+ loads per week should clean every 6 months.
Tools and Materials You Need
Here is what to grab before you start. You probably own half of this already.
- Dryer vent cleaning brush kit ($15 to $22): This is a long, flexible brush with extendable rods that reach deep into the duct. The Holikme 30-foot dryer vent cleaner kit on Amazon is a popular budget pick. LintEater and Gardus LintEater kits run $20 to $25 and include a drill attachment for faster spinning.
- Vacuum with a hose attachment: A shop vac works best, but a regular household vacuum with a crevice tool is fine.
- Screwdriver or nut driver: You need this to loosen the hose clamp connecting the duct to the dryer.
- UL-listed metal foil duct tape: For reattaching the duct afterward. Never use standard cloth duct tape on a dryer vent because it degrades from heat.
How to Clean a Dryer Vent From Inside and Outside
Follow these steps in order. The whole job takes about 30 to 45 minutes, even if your ductwork runs 15 to 20 feet to the outside wall.
1. Kill the Power and Make Room
Yank the power cord from the outlet. Got a gas dryer? Twist the shutoff valve behind the machine to the closed position before you move anything. Now grab both sides of the dryer and shimmy it forward roughly 12 to 18 inches. You need enough clearance to reach the back panel comfortably, and you will want elbow room for the brush kit later.
2. Pop the Duct Loose
Behind the dryer you will spot a stubby 4-inch exhaust port with a duct hose clamped or taped onto it. Use your screwdriver to back off the worm gear clamp (or peel off any metal foil tape), then wiggle the hose free. Expect a small avalanche of gray lint the moment the connection breaks. Totally normal, and a preview of what is waiting deeper inside.
3. Deep-Clean the Exhaust Port and Lint Trap Slot
Grab your vacuum and stick the crevice nozzle straight into the dryer's exhaust opening. Suck out every visible clump. Then pop the lint screen out of its slot on top of (or inside) the dryer door and vacuum down into that narrow housing. Compacted lint hides below the screen where your fingers never reach, and it quietly chokes airflow for months without you knowing.
4. Run the Brush Through the Wall Duct
Snap together a few rods from your vent cleaning brush kit and feed the bristle head into the duct opening in the wall. Twist it as you push, or for a faster job, chuck the rod end into a cordless drill set to low speed. The spinning action shreds packed lint that a hand twist barely dislodges.
Shove the brush as deep as it reaches, then draw it back slowly. Do this two or three passes. On the first pull you will likely drag out a thick wad of lint, dryer sheet fragments, and fine dust. By the third pass the brush should come back mostly clean.
5. Attack From the Exterior Vent
Head outside and locate where your dryer exhaust exits the house. Look for a small hooded flap mounted on an exterior wall, typically at ground level near the laundry room. If the cover pops off or unscrews, remove it and shove the brush kit in from this direction, pushing toward the interior. This two-sided approach catches debris that settled in the middle of long duct runs where neither end alone can reach.
Inspect the vent hood while it is off. Louvers caked with lint need a stiff scrub. A cracked hood, or one with a missing flap, should be swapped out. Replacement vent covers run $8 to $15 at any hardware store, and a flapless hood is basically an open invitation for birds, mice, and winter drafts to set up camp in your ductwork.
6. Reassemble and Test
Vacuum the floor behind the dryer, the wall opening, and any lint debris that fell during the process. Push the duct hose back onto the dryer exhaust port and lock it down with a clamp or fresh metal foil tape. Slide the dryer into its spot, restore power (and gas, if applicable), and fire up an empty cycle on high heat for about 10 to 15 minutes. That blast of hot air pushes any straggler lint out through the exterior vent.
Step outside one last time. You should feel a solid rush of warm air from the vent hood, and the flap should swing open easily. If both check out, you are done.
Rigid vs. Flexible Dryer Duct: Which Is Safer?
If you pulled off a white vinyl or thin foil duct during this project, you should replace it. Vinyl ducts are a fire hazard and are actually banned by most building codes in 2026. The safest option is a 4-inch semi-rigid or rigid aluminum duct. Rigid metal ducts have smooth interior walls that resist lint buildup far better than the ribbed surface of flexible foil hoses.
| Duct Type | Fire Safety | Lint Buildup | Cost | Best For |
|---|---|---|---|---|
| Rigid aluminum | Best | Lowest (smooth walls) | $12 to $25 | Permanent install, long runs |
| Semi-rigid aluminum | Good | Low | $10 to $18 | Tight spaces, short runs |
| Flexible foil | Acceptable | Moderate (ribbed surface) | $8 to $15 | Temporary or rental situations |
| Vinyl/plastic | Poor (banned) | High | $5 to $10 | Do not use |
A rigid aluminum duct upgrade costs $12 to $25 for a standard 8-foot length at Home Depot. The swap takes about 15 minutes and is one of the best small investments you can make for dryer safety.
How Often Should You Clean a Dryer Vent?
The general rule is once a year for most households. But your ideal schedule depends on how much laundry you run:
- 1 to 4 loads per week: Once a year is enough.
- 5 to 8 loads per week: Clean every 6 months.
- Households with pets: Pet hair accelerates lint buildup significantly. Every 6 months minimum, or every 4 months if you have multiple large dogs.
- Long duct runs (over 15 feet) or multiple bends: Clean every 6 months regardless of laundry volume. Bends and long distances trap more lint.
Mark your calendar. Seriously. Fall is the perfect time for this job because you are about to ramp up dryer usage through the colder months. While you are doing pre-winter maintenance, consider weatherizing your home for winter to cut heating costs and stop cold air drafts before they start.
Professional Dryer Vent Cleaning: When to Call Someone
Most homeowners can handle this job themselves. But there are situations where calling a professional makes sense:
- Your duct runs longer than 25 feet with multiple 90-degree turns. Pros have powered rotary brush systems that reach farther than consumer kits.
- You suspect a bird nest or rodent blockage in the vent. This happens more often than you would expect, especially with older vent covers that lost their flaps.
- The duct runs through the roof instead of an exterior wall. Roof-exit vents are harder and riskier to access.
- You notice lint inside the dryer cabinet itself. This means the internal ducting has a leak, and the dryer may need partial disassembly.
Professional dryer vent cleaning costs $100 to $170 on average in 2026, depending on duct length and accessibility. Some HVAC companies offer it as an add-on to annual furnace inspections for $75 to $100.
Common Mistakes That Cause Dryer Vent Problems
Even after you clean your vent, bad habits can undo your work fast. Watch out for these:
- Forgetting the lint screen between loads. Clearing the screen before you toss in a new load is the single cheapest way to keep your vent cleaner, longer. Takes two seconds.
- Shoving the dryer flush against the wall. When the duct hose gets crushed or kinked behind the machine, it chokes airflow almost as badly as lint does. Keep a gap of at least 4 to 6 inches so the hose has room to curve without collapsing.
- Overdoing dryer sheets. Those sheets leave a thin waxy film on the lint screen mesh over time. Try running hot water through your lint screen. If the water beads up and pools on the surface instead of draining through, the mesh is coated. Scrub it down with a nylon brush and a drop of dish soap.
- Exhausting into the attic or crawl space. Older homes sometimes route the dryer exhaust into an interior space rather than outside. That dumps hot, moist, lint-filled air into your attic framing, which is a recipe for mold growth, wood rot, and an eventual fire. If your setup looks like this, rerouting the duct to an exterior wall should be near the top of your project list.
What This Job Costs vs. What It Saves
A dryer vent cleaning brush kit costs $15 to $25 as a one-time purchase. You will reuse it for years. Compare that to the costs of not cleaning:
- Higher energy bills: A clogged vent can add $18 to $30 per month in extra drying time.
- Premature dryer replacement: A new mid-range dryer costs $500 to $900 in 2026. A clogged vent can cut your dryer's life by 3 to 5 years.
- Fire damage: The average dryer fire causes $9,000 to $15,000 in damage, not counting potential injury.
- Professional cleaning: $100 to $170 per visit, versus doing it yourself for free once you own the brush kit.
Spending 30 minutes and $20 once a year to avoid hundreds or thousands in damage and wasted energy is about as straightforward as home maintenance gets.
Post a Comment for "How to Clean a Dryer Vent Yourself"
Post a Comment