
How to Organize Kitchen Cabinets That Actually Stay Organized
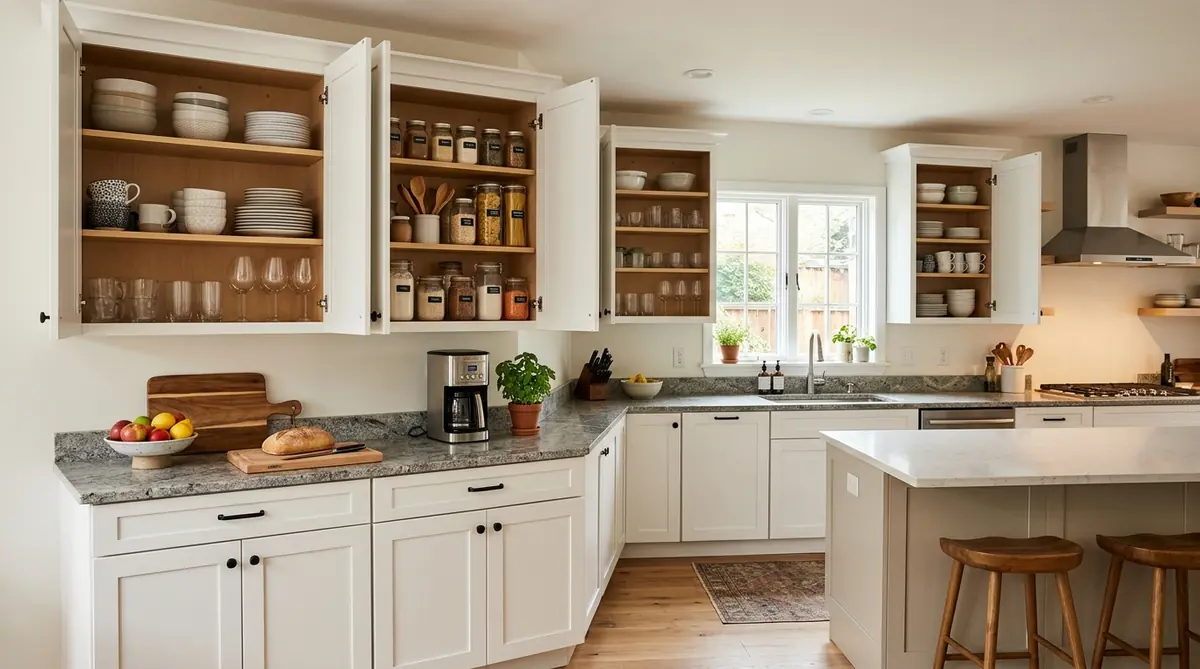
Your kitchen cabinets are probably a mess right now. Cups stacked behind cereal boxes, spices crammed into a corner you can't reach, and that one Tupperware lid that doesn't match anything. You're not alone. Most kitchens turn into chaos within a few months of moving in, and the fix is simpler than you think. You don't need a $500 organizer haul from The Container Store. You need a system that actually makes sense for how you cook.
Here's the real answer up front: empty every cabinet, group items by how often you use them, and put the daily stuff at eye level between your shoulders and your waist. That single rule fixes about 80% of kitchen cabinet clutter. The rest comes down to a few cheap inserts and some common sense about zones.
Why Most Kitchen Cabinet Systems Fail
People buy lazy Susans, shelf risers, and drawer dividers before they even know what's going in each cabinet. That's backwards. The products come last. First, you need to figure out your kitchen zones, because a cabinet next to the stove should hold completely different things than one near the dishwasher.
The other mistake? Treating every cabinet the same. Corner cabinets have dead space that a standard shelf riser won't fix. Upper cabinets near the ceiling are practically useless for daily items. Lower cabinets with deep shelves swallow small items whole. Each type needs its own approach.
Start by Emptying Everything (Yes, Everything)
Pull every single item out of every cabinet. Lay it all on the counter and kitchen table. This part feels excessive, but it does two things you can't skip:
- You'll find duplicates. Most households have 3-4 spatulas, multiple sets of measuring cups, and enough plastic bags to fill a landfill.
- You'll actually see what you own. Half the time, the reason your cabinets are messy is because you have too much stuff crammed into too little space.
Be honest with yourself during this step. That fondue set from 2019? The bread maker you used twice? The chipped mugs you keep "just in case"? Get rid of them. Donate, recycle, or toss. You can't organize clutter. You can only move it around.
Set Up Kitchen Zones That Match Your Workflow
Professional kitchen designers use a concept called work zones. You don't need a designer, though. Just think about the five main things you do in a kitchen:
- Cooking zone (near the stove): pots, pans, cooking utensils, oils, spices
- Prep zone (near the main counter space): cutting boards, knives, mixing bowls, measuring cups
- Cleaning zone (near the sink/dishwasher): dish soap, sponges, trash bags, cleaning supplies
- Storage zone (pantry or tall cabinets): dry goods, canned food, bulk items
- Serving zone (near the dining area): plates, bowls, glasses, silverware
Map your existing cabinets to these five zones. The cabinet directly above or next to your stove? That's your cooking zone. The one closest to the dishwasher? Serving zone, because unloading is faster when plates go right where they'll be used next.
The Eye-Level Rule for Upper Cabinets
Your most-used items belong between shoulder height and waist height. That's roughly the bottom two shelves of upper cabinets and the top shelf of lower cabinets. This is the prime real estate of your kitchen.
Daily items go here: coffee mugs, drinking glasses, the plates you actually use (not the "nice" set gathering dust). Things you use weekly go one shelf higher or lower. Seasonal or rarely-used items get the top shelf of upper cabinets or the back of lower ones.
In 2026, the average American kitchen has 15 to 20 upper cabinet compartments. If you're only actively using 8-10 of them on a daily basis, that's normal. The rest are storage, not active workspace.
Fixing the Corner Cabinet Problem
Corner cabinets are where kitchen items go to disappear. The standard fix is a lazy Susan, and honestly, a good one works fine. A 2-tier lazy Susan costs about $25-$40 at Home Depot or Lowe's and instantly makes that dead corner space usable.
But here's what most guides won't tell you: not every corner cabinet fits a lazy Susan. Measure the interior width and depth before buying. You need at least 20 inches of clearance for a standard round turntable. If your corner cabinet is L-shaped with a narrow opening, a pull-out wire rack ($50-$80) works better than a turntable that won't spin freely.
For blind corner cabinets (the ones where you can only reach through a narrow side opening), a swing-out organizer is your best bet. They run $60-$120 and pull the entire shelf out through the opening so nothing gets lost in the back.
Lower Cabinet Organization That Actually Lasts
Lower cabinets are the biggest headache because they're deep, dark, and hard to see into. Stacking pots three-high seems efficient until you need the one on the bottom and have to dismantle the whole pile.
For pots and pans: A vertical pan organizer ($20-$35) stands your pans upright like file folders instead of stacking them. You can pull out any pan without touching the others. This one change will save you more frustration than any other organizer in your kitchen.
For under-sink cabinets: A 2-tier expandable shelf ($15-$25) doubles your usable space. Put cleaning sprays on the top tier and backup supplies on the bottom. Keep a small bin for sponges and scrub brushes so they don't end up scattered across the cabinet floor.
For deep lower shelves: Pull-out drawers or sliding baskets ($30-$60 per shelf) are the single best upgrade you can make. They turn a deep cave into a visible, accessible shelf. If you're going to spend money on one organizer, make it this one.
If you've been looking at ways to build a DIY closet organizer with plywood, the same pull-out shelf concept works in kitchen cabinets too. A few plywood boards, drawer slides from the hardware store, and about two hours of work gets you custom pull-out shelves for a fraction of the retail price.
Shelf Risers and Stackable Organizers: When to Use Them
Shelf risers are cheap ($8-$15 each) and they double your vertical space in cabinets with tall shelves and short items. They work best for:
- Mugs and cups (stack risers so mugs sit on two levels instead of one)
- Plates and bowls (put dinner plates below, salad plates on the riser above)
- Canned goods (a 3-tier stepped riser lets you see every can label at a glance)
Where they don't work: deep lower cabinets (you still can't see or reach the back) and cabinets with adjustable shelves (just move the shelf instead of adding a riser).
Stackable clear bins ($5-$12 each) are great for grouping small loose items like tea bags, seasoning packets, snack bars, and baking supplies. Label the front with a basic label maker or a strip of masking tape and a marker. Fancy labels are unnecessary.
Spice Storage That Doesn't Drive You Crazy
Spice organization deserves its own section because it's the most universally frustrating part of kitchen cabinets. The average home cook has 20-40 spice containers, and they're all different sizes.
Three options that actually work:
- Drawer inserts ($15-$30): If you have a spare drawer near the stove, angled drawer inserts let you read every label from above. This is the best solution if you have the drawer space.
- Cabinet door-mounted racks ($10-$20): Screw a wire rack onto the inside of a cabinet door near the stove. Keeps spices visible without taking up shelf space. Most racks hold 15-20 standard jars.
- Pull-out spice racks ($25-$50): A narrow pull-out that fits in a slim gap between cabinets or next to the fridge. Works especially well in kitchens with limited cabinet count.
Whichever system you pick, alphabetize your spices. It sounds obsessive, but when you have 30+ jars, alphabetical order is the only system that lets you grab what you need in seconds without reading every label.
What About Tupperware and Food Storage Containers?
Mismatched food storage containers are the number one source of kitchen cabinet chaos. The lids never match, they take up enormous amounts of space, and they multiply like rabbits.
The fix is ruthless: throw out every container that's missing its lid, stained, warped, or cracked. Then buy a single matching set. A basic 24-piece glass or BPA-free plastic set costs $25-$50 and replaces that entire mess of random takeout containers and mismatched Tupperware.
Store containers nested (stacked inside each other by size) with lids standing upright in a separate bin or lid organizer ($10-$15). Keeping lids separate from bases sounds counterintuitive, but it saves an enormous amount of space and stops the lid-avalanche every time you open the cabinet.
Maintain the System Without Losing Your Mind
Any organization system will fall apart if you don't maintain it. But maintenance doesn't have to be a big project. Two habits are enough:
- The 2-minute reset: When you unload the dishwasher, take an extra 2 minutes to put things back in their designated spots instead of shoving them wherever they fit. This one habit prevents 90% of cabinet chaos.
- Quarterly purge: Every 3 months, open each cabinet and pull out anything you haven't used since the last check. It takes about 15 minutes and keeps the clutter from building back up.
Don't aim for Instagram-perfect. A cabinet that works is better than a cabinet that looks gorgeous in a photo but doesn't match how you actually cook. The best kitchen organization is the one you'll actually maintain six months from now.
What This All Costs
You can organize a full kitchen for surprisingly little. Here's a realistic budget breakdown for a standard kitchen with 15-20 cabinets:
- Shelf risers (4-6): $40-$60
- Lazy Susan for corner cabinet: $25-$40
- Pull-out drawers for 2-3 lower cabinets: $60-$180
- Vertical pan organizer: $20-$35
- Under-sink expandable shelf: $15-$25
- Spice rack (door-mount or drawer insert): $10-$30
- Clear bins (6-10): $30-$60
- Matching food storage set: $25-$50
Total: $225-$480 for a complete kitchen cabinet overhaul. That's a fraction of what a professional organizer charges ($500-$1,500 for a single kitchen session), and you'll know exactly where everything goes because you built the system yourself.
If your kitchen remodel plans go beyond just the cabinets, upgrading your countertops can make a big difference too. Check out our guide on how to install butcher block countertops yourself for a budget-friendly surface upgrade that pairs well with freshly organized cabinets.
The whole project takes a single Saturday afternoon for most kitchens. Empty everything in the morning, sort and purge before lunch, install your organizers after lunch, and put everything back by dinner. You'll open your cabinets Monday morning and wonder why you didn't do this years ago.
Post a Comment for "How to Organize Kitchen Cabinets That Actually Stay Organized"
Post a Comment