
How to Install a Dimmer Switch Yourself
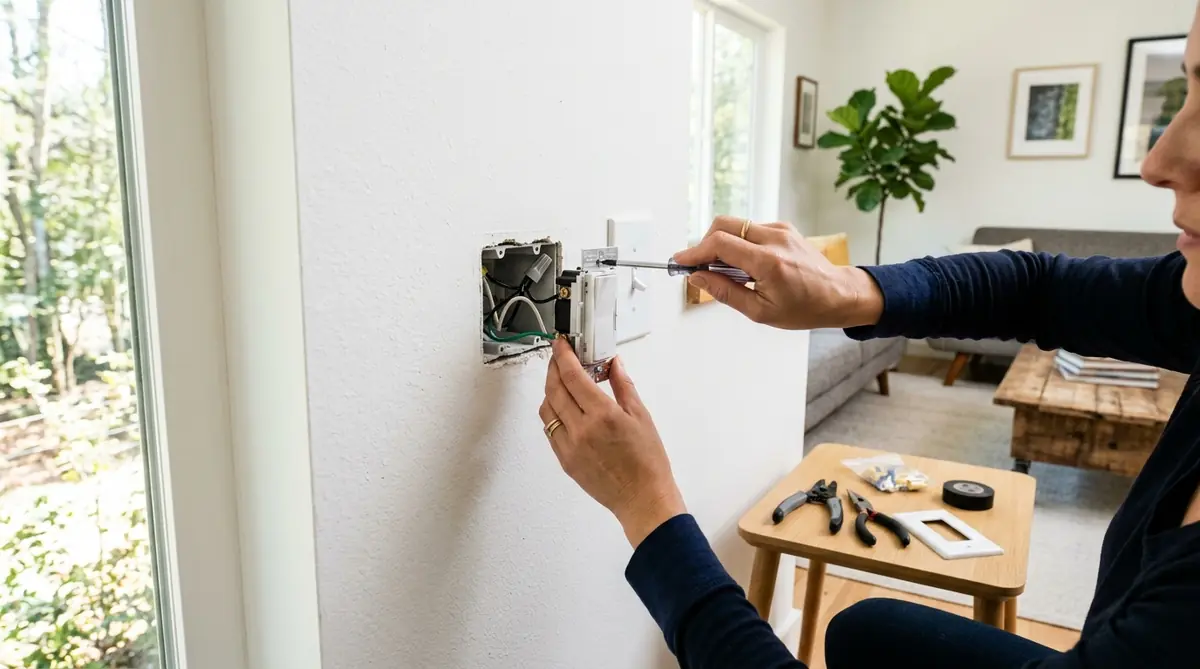
Swapping a regular light switch for a dimmer is a 20-minute project that costs under $25. No electrician required. If you own a screwdriver and can match wire colors, you've got all the skills this job demands. I've done this in every house I've lived in, and it ranks as the single best return-on-effort upgrade you can make to any room's atmosphere.
Below: the full walkthrough, the parts you'll need, and the specific pitfalls that catch beginners off guard.
Why Bother With a Dimmer?
A regular wall switch gives you two settings: blinding overhead glare or total darkness. That's it. A dimmer adds the entire spectrum between those extremes, and the benefits go beyond mood lighting.
Running dimmable LEDs at 50% to 70% of their peak output cuts the power draw at that fixture by roughly 30% to 40%. Across a house with six to eight dimmed fixtures, that translates to $22 to $35 in annual electricity savings at the current US average rate of $0.17 per kWh as of 2026. LED drivers also run cooler at reduced output, which means the bulbs themselves tend to last longer before you need replacements.
But the honest main reason people install dimmers? A living room at 40% brightness at 9 PM just feels completely different from the same room at full blast. That comfort factor is worth more than the electricity math.
What You'll Need on the Counter
- A dimmer switch. For one switch controlling one fixture, grab a single-pole model. If two switches in different spots control the same light (hallways, staircases), you need a 3-way version. Reliable picks: Lutron Diva CL ($18), Leviton SureSlide ($15), Legrand radiant ($22).
- Non-contact voltage tester. Around $12 to $18 at Home Depot or Lowe's. This is the one tool you absolutely cannot skip.
- Phillips and flathead screwdrivers
- Wire nuts (most dimmers include a set in the box)
- Electrical tape
- Wire strippers (only if existing wire ends look corroded or too short)
All-in material cost: $28 to $45 for everything from scratch. Hiring someone for the identical job runs $75 to $150 depending on your area.
The Bulb Compatibility Trap
More people get tripped up by this than by any part of the actual wiring. The dimmer and the bulb need to speak the same language, or you'll get flickering, buzzing, or a light that refuses to go below half brightness.
Incandescent and halogen: Pair with literally any dimmer on the market. Zero compatibility headaches.
LEDs: The bulb box must specifically say "dimmable." A non-dimmable LED on a dimmer circuit will strobe, hum, or only respond in the top 50% of the dimming range. On the dimmer side, make sure the model is rated for LED loads. Older dimmers built for incandescent wattages will misbehave with modern LEDs even when those LEDs are technically dimmable.
CFLs: The vast majority are not dimmable at all. If you still have CFLs in the fixture, replace them with dimmable LEDs before you touch the switch.
Figure Out Your Switch Type First
Walk up to the switch you plan to replace. Does only that one switch operate the fixture? That's single-pole, the easiest version of this project. If a second switch somewhere else also toggles the same light, you've got a 3-way configuration and need the correct dimmer for it.
Quick confirmation: pop off the wall plate and peek at the wiring behind the existing switch. Two wires attached to it (plus a bare copper or green ground) means single-pole. Three attached wires plus ground means 3-way. Count before you buy.
Single-Pole Dimmer: The Full Process
Kill the Power and Verify It's Dead
Find the correct breaker in your main electrical panel and flip it off. Then walk back to the switch with your voltage tester and touch the probe to both terminals on the existing switch. You're looking for zero response from the tester. If it beeps or lights up, you flipped the wrong breaker. Go back and try again until you get a confirmed dead circuit.
Do not skip this. US residential wiring carries 120 volts, which is enough to cause serious injury. A $15 voltage tester is the cheapest safety device you'll ever own.
Pull Out the Old Switch
Remove the wall plate screws, then back out the two screws that anchor the switch body to the electrical box. Ease the switch forward out of the wall. You'll see wires attached by one of two methods: wrapped around screw terminals on the sides, or pushed straight into spring-loaded holes on the back (called backstab ports).
For screw connections, loosen each terminal screw and slip the wire loop off. For backstab connections, push a small flathead into the release tab next to the hole and pull the wire free. Take note of the colors: typically two black wires (hot and load) plus a green or bare copper ground.
Know Which Wire Is Which
In a standard single-pole box, you'll find:
- Line (hot): The wire delivering power from your breaker panel. Black insulation, usually.
- Load: The wire heading out to the light fixture. Also black or occasionally red.
- Ground: Bare copper or green-insulated. Connects to the green terminal.
- Neutral (white): Often bundled together in the back of the box under a wire nut. Basic dimmers don't connect to this, but smart dimmers often do.
Good news for single-pole installations: the hot and load connections on a basic dimmer are interchangeable. There's no wrong order for connecting those two leads.
Wire the New Dimmer In
Modern dimmers come with pre-attached wire leads (pigtails) rather than screw terminals. The connection method is straightforward:
- If the bare copper at the end of each house wire looks dark, corroded, or too short, clip the tip off and strip a fresh 3/4 inch of insulation with your wire strippers.
- Pair one of the dimmer's black leads with the hot wire. Hold them together pointing the same direction, slide a wire nut over both, and twist the nut clockwise until it's tight and neither wire pulls out when you tug gently.
- Pair the other dimmer lead with the load wire. Same wire nut technique.
- Attach the dimmer's green ground lead to the ground wire from the box. If the box itself is metal, loop a short piece of bare copper from the ground bundle to the box's green grounding screw as well.
- Wrap one layer of electrical tape around each wire nut. Not technically required by code everywhere, but it stops nuts from vibrating loose inside the box over months and years.
Tuck Everything Back and Fire It Up
Accordion-fold the wires neatly into the electrical box. Don't cram or crease them. Screw the dimmer body into the box with the mounting screws, snap or screw the wall plate on, and head back to the panel.
Flip the breaker back on. At the dimmer, bring it to full brightness first. The light should come on clean with no flicker. Then slowly reduce to the lowest setting. Smooth transition with no buzzing or strobing means the install is solid and the bulb compatibility is good. A faint hum right at the very lowest setting is sometimes normal with certain LED brands, but noticeable flickering points to a bulb that isn't truly compatible with your dimmer model.
What Changes for a 3-Way Setup
In a 3-way circuit, only one of the two switches gets replaced with a dimmer. The other one stays as a normal 3-way toggle.
The wiring difference: a 3-way switch uses three conductor wires plus ground instead of two. One of those three connects to the "common" terminal, which is typically a dark-colored screw (black or dark brass) rather than the lighter brass of the traveler terminals. The other two are "traveler" wires that shuttle signals between the two switch locations.
Before you disconnect anything, wrap a strip of tape around the wire on the common terminal so you can identify it later. Mixing up the common and a traveler is the number one reason 3-way dimmer installs fail. With the common wire tagged, connect it to the dimmer's common lead (usually marked on the packaging or colored differently), connect the two travelers to the dimmer's traveler leads, and ground to ground.
Mistakes That Catch First-Timers
| Problem | What You'll Notice | The Fix |
|---|---|---|
| Non-dimmable bulbs in the fixture | Flickering, audible buzz, limited range | Replace with bulbs labeled "dimmable" |
| Old incandescent-only dimmer paired with LEDs | Flicker at low settings, won't dim below about 30% | Buy a dimmer rated for LED/CFL loads ($18 to $25) |
| Exceeding the dimmer's wattage rating | Dimmer runs hot to the touch | Most residential dimmers handle 600W incandescent or 150W LED total. Count your bulbs. |
| Not testing voltage before touching wires | Electrical shock | Use a non-contact voltage tester every single time. Period. |
| Confusing common and traveler on a 3-way | Dimmer doesn't respond, or only works from one location | Tag the common wire before removing the old switch |
Standard Dimmer vs. Smart Dimmer: Which Makes Sense?
Since you're already pulling the switch off the wall, you might wonder if jumping straight to a smart dimmer is worth the price gap. Here's the quick comparison:
A standard Lutron Diva CL or Leviton SureSlide costs $15 to $25 and gives you a physical slider or rocker to set brightness. No internet needed, no app, no setup beyond the wiring. It does one job and does it well.
A Wi-Fi or Zigbee smart dimmer (Lutron Caseta at $50 to $65, Leviton Decora Smart at $35 to $50) adds app control, voice commands through Alexa or Google Assistant, scheduling, and scene presets. The wiring process is basically identical, but most smart models require a neutral wire connection. Homes built before roughly 1985 sometimes lack neutral wires in switch boxes, which limits your smart options. Lutron Caseta is one of the few that works without neutral.
My take: if you're replacing just one switch and you don't already have a smart home setup, go standard for now. Spend the $20, enjoy the dimming, and upgrade to smart later if you catch the automation bug. If you already have Alexa running your smart thermostat and other devices, a smart dimmer makes the ecosystem more complete.
Choosing the Right Dimmer Style for Each Room
Dimmers come in several physical form factors, and the one you pick affects daily usability more than you'd think:
- Slider with toggle: A vertical slide bar next to a small on/off switch. Fast to adjust, intuitive for anyone. Works great in kitchens and home offices where brightness changes frequently throughout the day.
- Rotary knob: Turn to dim, push to toggle. Compact footprint, hard to accidentally bump. Good match for bedrooms and hallways.
- Paddle/rocker: Looks identical to a standard Decora-style switch at a glance. Press the top to brighten, bottom to dim, or tap for on/off. Best choice when you want every switch in the house to match visually.
- Touch-sensitive: Tap for on/off, press and hold to dim. Sleek and modern, but some users find the lack of tactile feedback annoying in the dark.
For a uniform look throughout the house, commit to one brand and finish color across all your switches and dimmers. Both Lutron and Leviton sell matching wall plates, blanks, and outlets in white, ivory, almond, and grey, so nothing looks mismatched.
Situations Where You Should Hire a Pro Instead
This is a beginner-friendly project for standard wiring, but certain conditions call for a licensed electrician:
- The wires inside the box are silver-colored aluminum instead of copper. Aluminum wiring needs special anti-oxidant connectors and specific handling techniques.
- Any sign of scorching, melted plastic, or heat damage on existing wires or the box itself.
- More wires in the box than you can confidently identify (especially four or more conductors beyond the ground).
- Knob-and-tube wiring, which shows up in homes built before the 1950s. It's a fundamentally different system that has its own safety rules.
- A breaker that won't stay tripped or an inability to figure out which breaker feeds the circuit.
A service call for a straightforward switch replacement runs about $75 to $125 in most US metro areas. That's a small price compared to the cost of an electrical fire from guesswork on unfamiliar wiring.
Wrapping Up
A dimmer switch is one of those rare home upgrades where the effort is tiny, the cost is minimal, and the daily quality-of-life improvement is immediate. Twenty minutes with a screwdriver, about $20 in parts, and every evening in that room gets a little bit better. Start with the living room or bedroom, and odds are good you'll want to swap every switch in the house within a couple weeks.
Voltage tester first. Match the dimmer to your bulb type. Tag that common wire if you're doing a 3-way. That's genuinely the whole checklist.
Post a Comment for "How to Install a Dimmer Switch Yourself"
Post a Comment